
~
So...a long time in the making, this was an idea that spanned off of mainly impulse...it all started back when I was visiting my sister's house a few months ago...she looked at a "Shanty Wall" in Animal Crossing and said something like "My God, does that ever look Silent-Hilly." So she found a scary looking floor (Incidentally, the "Shanty Flooring") and filled her upstairs with all sorts of creepy looking items, such as strange pottery, eerie hospital equipment, and a haunting audio track. It was a nice try, did look rather depressing, but it still looked too bright. I thought I could do better, making my own designs. Using my own Wii which was with me, I made my first attempt at a custom Silent Hill flooring. And the rest is history.
So without further ado - The Animal Crossing Silent Hill House
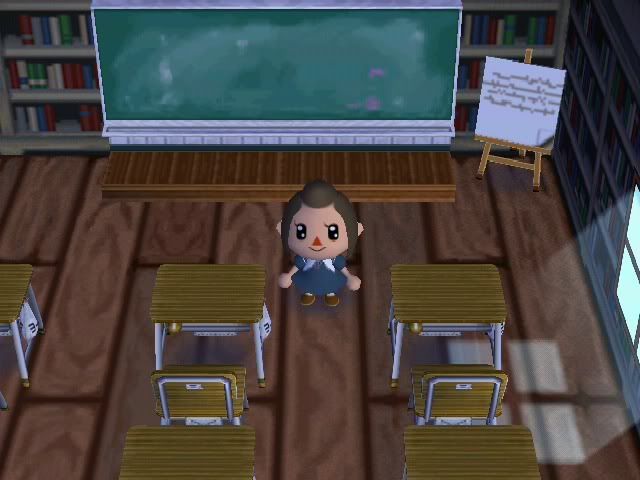
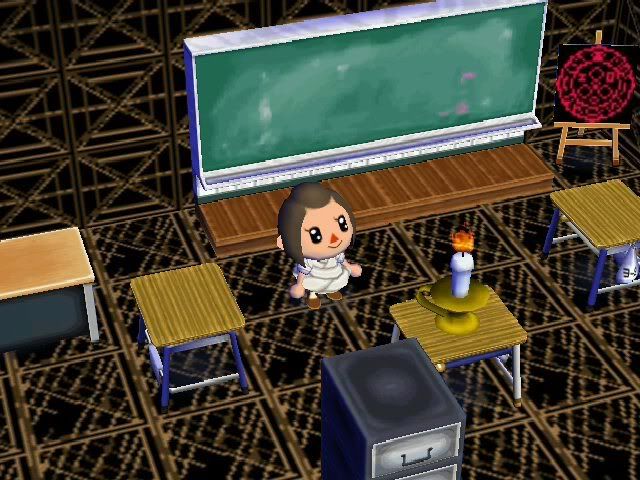
MAIN FLOOR: The main floor's theme was originally going to be just random scary stuff that reminded us of Silent Hill. But I then decided that I would base it on the School area of Silent Hill. However, since I couldn't find the floor and what not that I wanted, I lost interest for a while...but upon finding some very nice school equipment, my interest was revitalized and I set out to make the best damn Midwich Elementary School replica Animal Crossing would allow.
-Normal-
Angle 1:
Angle 2:

Angle 3:
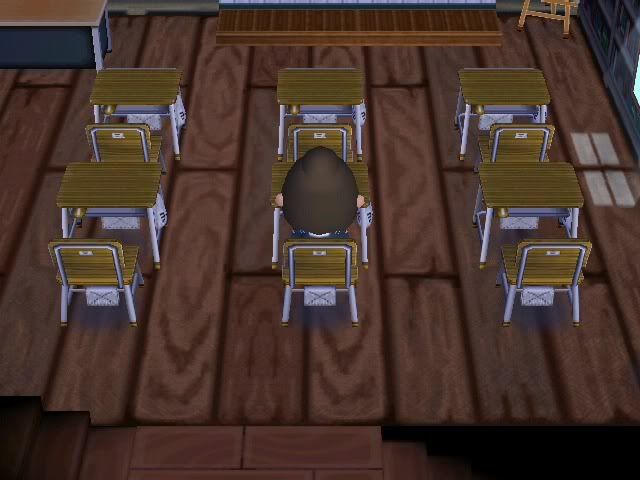
Although the Library Wall doesn't make a whole lot of sense, it's still pretty eerie which I decided was a fair trade. I used to have Birch Flooring on the ground but decided to go with Common Flooring after I found a new use for the Birch. I was pleased to have found those desks and chairs, and was happy to finally acquire the large Chalk Board as it is a two-piece item that "snaps" together. The Easel by the chalk board is based on a design I got from Wendell (the notepad design) and I added the faint "letters."
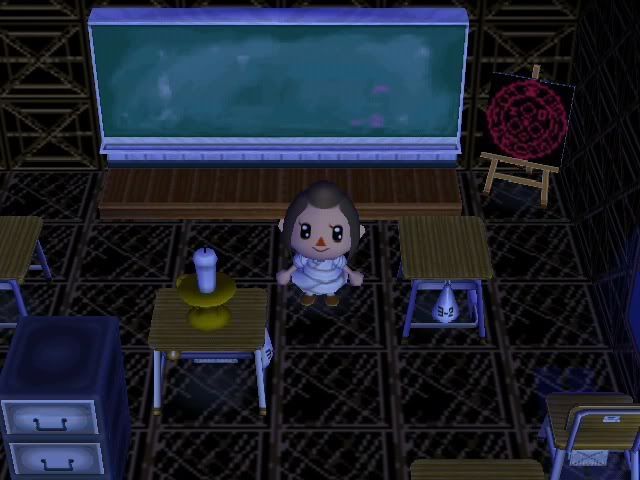
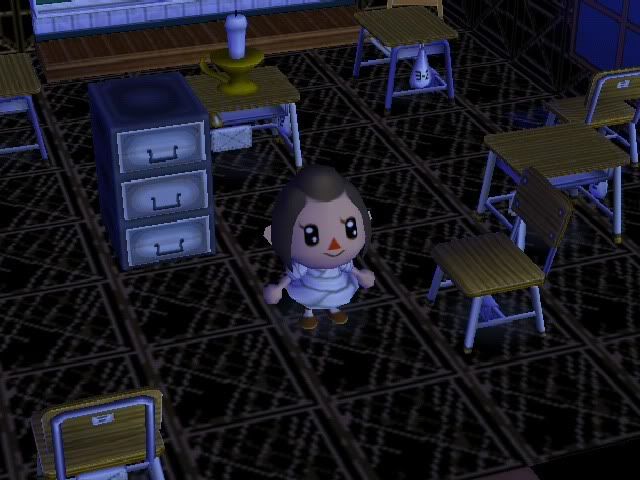
-Reverse Side-
Angle 1:
Angle 2:
Angle 3:
It's been suggested that I should leave the school floor for last as it really is my most impressive floor. But I'm trying to do it in a certain order, but yes...I really did kick this one's ass. I'm especially proud of the Halo of the Sun over there (The save point in Silent Hill 3). The floor was the very first custom design I made for the house, and the walls are the Third. I was very proud of those as well.
~~~~~~~
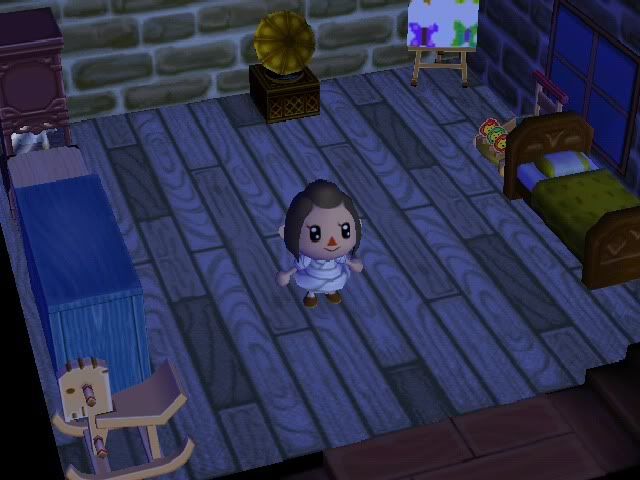
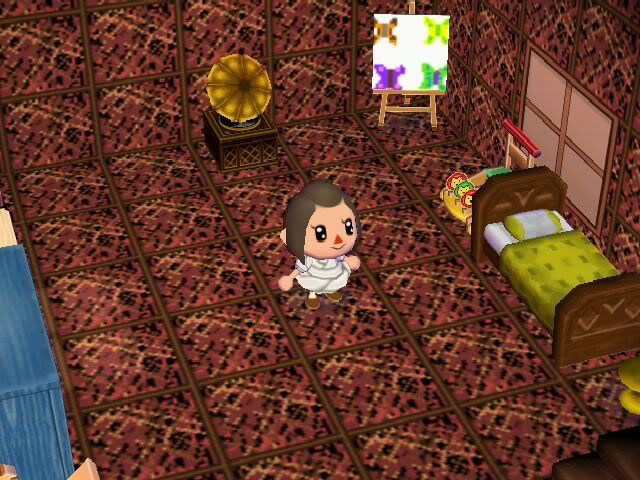
UPPER FLOOR: The upper floor's original theme was scrapped as it just didn't work well with the small size and windows, so I reluctantly moved that theme down to the basement and turned this into my rendition Alessa's childhood bedroom. I also made a reverse version although it seems a little wrong since there isn't normally one in the game but I really wanted to use the reverse floor/wall scheme that I did, so I decided to do it.
-Normal-
Angle 1:
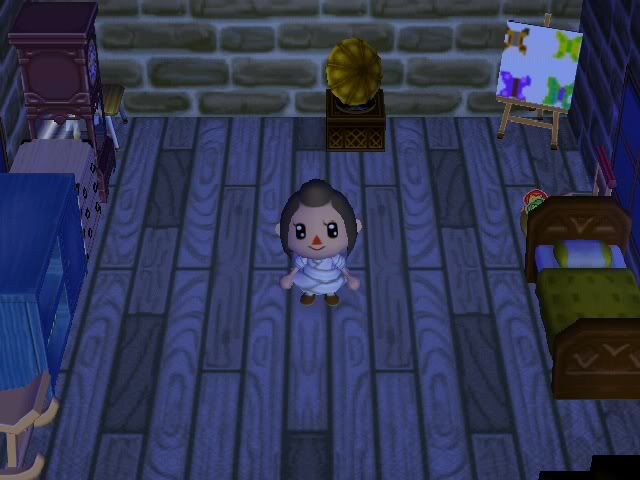
Angle 2:
There weren't many distinctive features I could add here, so I just tried to make a nice, eerie bedroom. I did however make that design of a child's rendition of butterflies as it is pretty important to that theme. Sometimes I switch that design out for Alessa's dress pattern since my designs are always full. You can't really tell but there's also a grandfather clock in there for basic eeriness. Additionally, this is where I decided to put the birch flooring
-Reverse Side-
Angle 1:
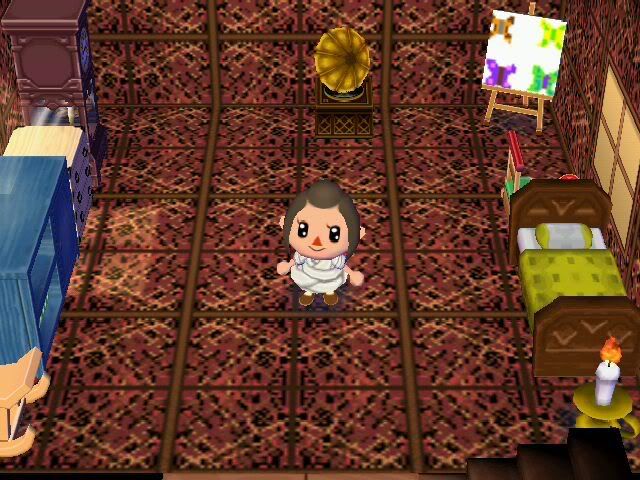
Angle 2:
I really wanted to use this surrounding scheme for something, so I decided to just use it for this, although the bedroom shouldn't have a reverse side. I also thought it would be creepier (and also much easier) if all the items stayed unchanged despite the [dare I say horrific?] change of the surroundings. Here, I'm using the second design I made for the house, which was originally meant to be a wall. There are two angles and forms - one showing the original design (angle 2), and one showing what it looks like, placed and rotated (angle 1) which is how I usually set it.
~~~~~~~~
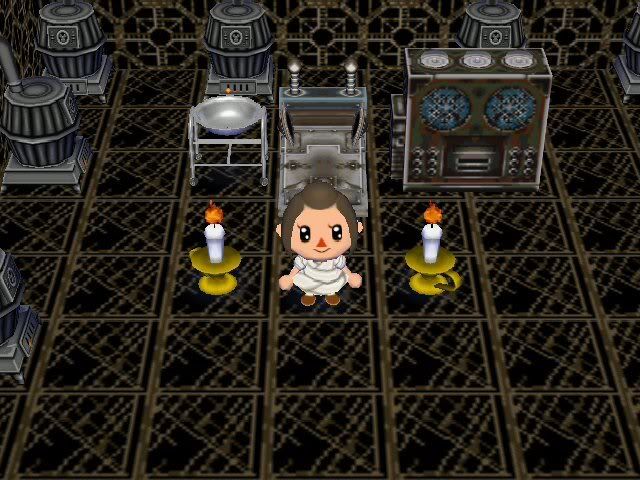
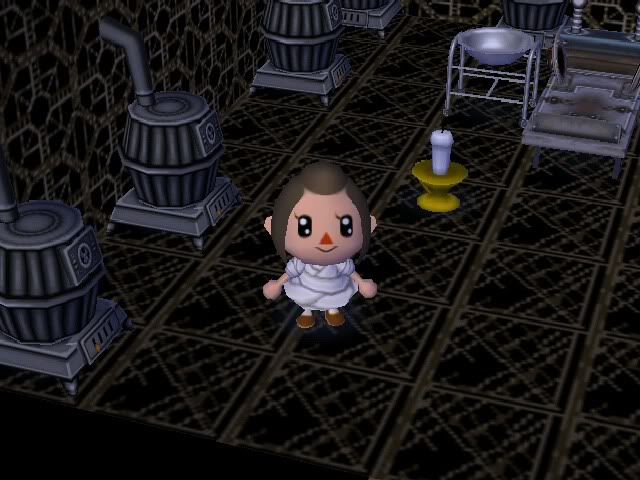
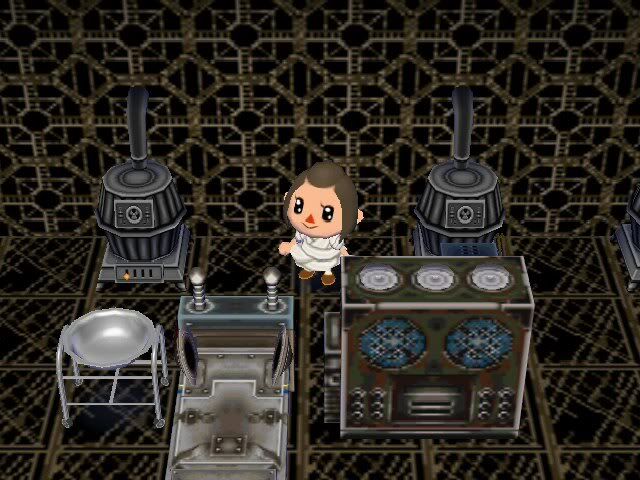
BASEMENT: I just got the basement for the house today and went straight to work on it at starting at 6 AM. I originally just wanted random scary, chain-linky, basement stuff in there like you'd see in Silent Hill but I had to put the bed/bench down there for the Hospital theme as it wouldn't be very right not to include it. So I just mixed the themes together to make Alessa's hospital room. I suppose it's sort of appropriate to put it down there. This room is always on the reverse side.
Angle 1:
Angle 2:
Angle 3:
Angle 4:
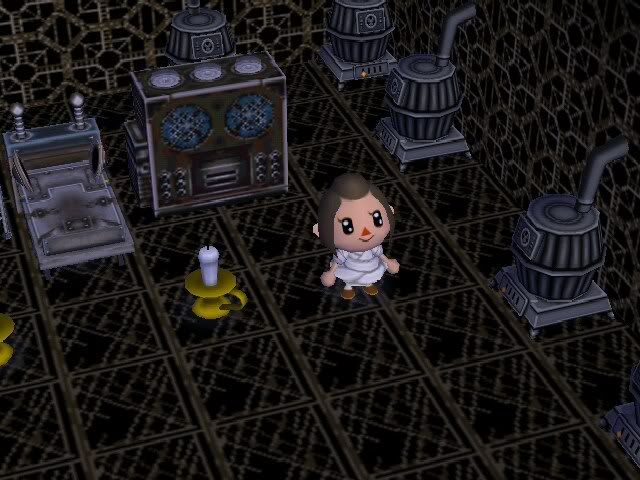
The basement was a hard sell for me but I think I finally got it to where I'm okay with it. There are about 10 stoves down there which are meant to resemble boilers, as you see plenty of boiler-like objects in the game. I'm using a Lab Bench and Amazing Machine it resemble Alessa's hospital bed and the nearby machinery. I can't tell you how proud I am of that wall. It took a long time to make and remake several times, but it was so worth it, definitely the best piece of design work I've done to date. I was going to make the floor down there the same but it seemed a bit repetitive, in the sense that the upper floor also had alike flooring and walls.
~~~~~~~~
House Exterior:
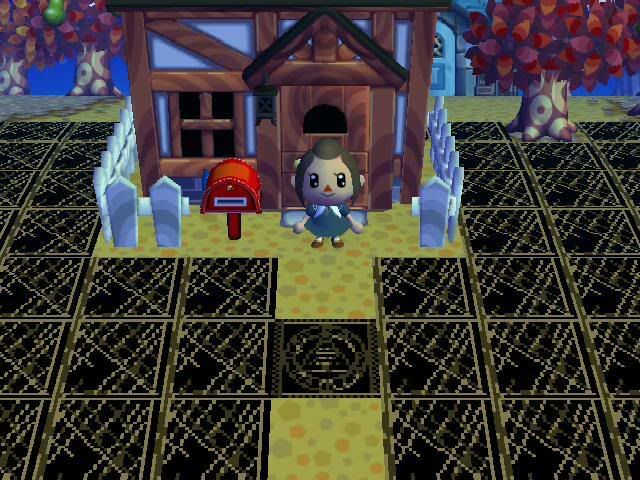
I liked this better when it was smaller, but I still rather like the outside...I'm especially proud of the seal of Medatron, I wish I had found more things to do with it inside the house.
~~~~~~~~
Regarding Alessa...
You'll notice she's wearing a different outfit in the first few images and outside of the house. You see, I made that school-girl dress for her to resemble her clothes from the game, but because all of my design space was used up before then, I really couldn't let her wear it. So in the images where she's not I gave her a mummy shirt, as a way to make her look bandaged, which is also appropriate. When she's wearing the school dress, I traded it the butterfly drawing for it at the Able Sisters, so the easel upstairs would have actually had the dress pattern on it at the time...
Other Info: Some down sides to this would be the lack of design storage, for one, as far as what you can use at one time, which is limited to eight designs. Another would be that although the flooring LOOKS metal, when walked on it still makes the sound of ceramic tiling. That's a bummer. Also the windows have the tendency to ruin the effect of the house, so it's nice that the basement had none.
One thing it was suggested I do would be to get an animal's key and keep it for myself to leave it in the house to be ever closer to the game. If an animal I don't like loses their key, I will certainly do this.
I use a musical track in the Reverse version of the rooms and the basement. It is the same track my sister used for her original attempt at the Silent Hill theme many months ago, and it is called "K.K. Dirge." It's a rather eerie tune, and is especially good at the end of its loop when you hear two loud, intimidating pounding noises. For effect it also has a skipping-record sound when it plays the first, lengthy, unsettling note. The main theme is a bit hokey for Silent Hill but I think having the track helps the rooms as a whole.
So yes...that's the Silent Hill House. It took a couple of months to make, what with the scrounging for appropriate items, and of course paying off the dreadful loans towards expansion. All of the custom designs were created by myself. My older sister Steph can also be credited for funding a lot of the project. I am very proud of it, and I know it makes me a new breed of mega-dork. If there are any questions, I will happily answer them. I'd explain everything in detail here but this journal is pretty damn long as it is. If the public interest is there, I'll make another journal showing off alternate design schemes/layouts for the rooms in the future.
Thank you for looking, I hope you've enjoyed it. I know I did.
~R.M.
No comments:
Post a Comment