Search This Blog

Showing posts with label Konami. Show all posts

Tuesday, May 4, 2010

Retro Review Tuesday: Operation C

-Introduction-

As a long time Contra fan, finding out it could be made portable for me was quite exciting news. And unlike the disappointing Gameboy port of Contra III, the MOSTLY original Gameboy title Operation C proved to be a fun and compact Contra experience, exhibiting both familiar features and charming little new ones. With pleasure, I now wish to share it with the rest of the gaming world who may be unaware of its very existence.


-Overview-

The basic idea of the game remains the same as the good old days (Not that this game could be considered new...). Run the side-scrolling course of the level, and if it moves, shoot it. And if it doesn't...try anyway. At the end of each level you will face a boss. Destroy it, and you will move on to the next area.

Graphically it is quite an impressive piece of work considering it is an early Gameboy game. There is an animation for aiming forward, upward, and in all diagonal directions (Shooting downward in normal levels is only possible when doing so during a spin jump). Enemy sprites are rather detailed and mostly easy to distinguish the identity of. Backgrounds aren't too terribly detailed in come areas but are still pretty good in others. The game is colorless played on a normal gameboy, and on a Gameboy Color or Gameboy Advance it is very basically colored.


Operation C's controls are responsive and easy to get the hang of. Their simplicity remains the same as the Nintendo originals. You jump with A and shoot with B. Using the Directional buttons is what aims, and you can aim in eight different directions. If you are used to the classic Contra games, you will certainly notice the lack of speed your character boasts, most likely in an effort of stretch out the course of the 5-level game. Along with low speed, your character's jumping is far from impressive, making several jumps in this game quite nerve-racking situations. These are the only real issues with controls.

The sounds are rather complex for a Gameboy game. A lot sounds for games of this period were basically a series of "thuds" and what not. This one however has nice, large explosion sounds, the sounds of motors in attack vehicles, the high-pitched bullet-ricochet sound indicating a hit target, a notably nice machine-gun sound effect, and many other distinct sounds.

Not only is the music none-too-repetitive, but if you're a Contra fan, you should find it familiar. All the levels play Gameboy-modified versions of the music heard in the original classic. This is with exception to Area 2, which seems to exhibit an original but energetic musical composition. Additionally, the music that plays during Boss battles is a modified version of the great music that played during the Base Boss battles of the first Contra.

-Your Operation C Experience-


The gameplay of Operation C is quite easy compared to the classic Contra and Super C games. This in mind, it is still a Contra game, and should not be taken
lightly. You are always busy as enemies are constantly running at you from every direction, a common nuisance. Like usual, you also have to destroy gun turrets, tanks, and other machinery, which take multiple shots. This makes the game more interesting, and keeps you a little more off balance. Gunshots coming at you are
reasonably slow which is good as you yourself are rather slow. However, some move very quickly and are very hard to avoid. A different array of battle styles from level to level ensure the
gameplay never gets too stale.


Battle takes place sometimes on flat ground, and other times as you jump from ledge to ledge, or even on rising and lowering elevators. The occasional mini boss or just rather large vehicle make their appearances throughout gameplay and certainly add to excitement and breaking up the usual flow of things. The slightly slower pace of this game doesn't really allow for the death-defying jumps and evasion maneuvers the classic games turned into necessity. This is good or bad, depending on how you look at it. As was said earlier, jumps ARE dramatic only because you can't jump far in Operation: C so getting over certain crevasses takes some thought and timing, but this isn't necessarily a high intensity moment.


If you're well acquainted with the second Contra installment, Super C, then these levels may seem a bit familiar, as the whole game seems based on it. Respectively, levels 2, 3, and 4 in Operation C bear notable resemblance to Super C's second, third, and sixth area. Also, parts of Op-C's  fifth and final level could be compared to Super C's Area 4. And as these levels were fun in Super C, that tells a good tale for this one's performance. Along with these similar features, the classic Konami way of changing view modes is in effect here as well, so a couple of the stages (two and four) are played in a top-down mode. This limits your maneuverability and evasion tactics to just simply walking in a different direction. You can, however, wander the screen freely in all directions adding more interest to the gameplay.


Your boss battles can still prove as epic as those found in the classic games. They are still many, many times the size of your character and are loaded with weaponry. Level 4's boss is especially notable, as its alien qualities and stressful difficulty start to really remind you just what game you are playing. Of course, you can expect the end of a Boss's life to be signified with plenty of explosions and sound. None of the Operation C bosses are exactly what you'd call classic, and aside from Boss 4, aren't terribly memorable, but they still tack on the difficulty and bring a decent enough conclusion to an area.


As with the original games, this one allows you to pick up different weapons, each with different abilities and uses. The gun selection is not as plentiful as the other games but it's still enough to make it interesting for you, especially considering how different the weapons that are here are. Along with that, all the guns are now fully automatic, meaning you can just hold the button for continued fire. And of course, the everlasting salvation that is the Spread Shot is present and more alive than ever.

Your default gun has been upgraded to a Machine Gun, which obviously is rather nice. It generally shoots in 5-bullet bursts and has enough speed to be its own best option for some situations.

Heat-Seekers or Homing Rounds are new to this game and are a very useful weapon. Basically, the gun's bullets seek out targets without you having to aim and in addition to that, have a slight Spread-Shot like quality, shooting three at a time.

Fireballs are just as they were in Super C, large balls that disperse into four others when they hit their target. Taking out multiple enemies is made easier with these. However unlike the Super C version of this gun, you can't charge it for a huge blast.


The Spread Shot is amped up in this game and is quite amazing the first time you see it. Interestingly, you have to sort of level it up first. When you first collect the universally beloved S-marked falcon, your Spread Shot shoots in 3-round belts, mildly useful. But if you collect a second Spread Shot while you still have the first, it turns into a nearly unstoppable weapon of Mass Destruction (The kind you're already aware of that doesn't act a cover story for the securement of foreign oil). It shoots the full, big, bad 5-round belts with an added rapid-fire feature that just obliterates all opposition. As it was in the early days, not all the belts are full but the initial few that are tend to take care of any issue that would cause. It's certainly worth your time to see this weapon in action.


So is portable Contra fun? Why yes it is. All the elements are there, and the difficulty is enough to keep you on edge but not too overbearing, allowing the average Joe to pick it up and enjoy it, something that can't necessarily be said for the original Contra and Super C. The action is a bit slower than its NES predecessors but it's still a pretty fast paced game for an early hand-held. You will still find yourself taking out the triple-barrel tanks, alien pods, and huge bosses just like you love. You get the classic Contra feel with the strange after taste that comes with all Gameboy versions of video games. The downfalls of this game will probably be how slowly you move and how poorly you jump, which accounts for about half of its difficulty. I personally could stand to see this game be a bit longer but I suppose I understand that it's merely a handheld. Now while the first four levels are pretty tame compared to the Contra you are accustomed to but worry not. The final level, five, comes roaring at you in true Contra spirit, with fast guns, dangerous aliens, and plenty of player death. If you wanted Contra, you're getting it now.


-Conclusion-


Your Contra experience isn't going to be exactly the same as the classic play through you may be familiar with upon turning on this game. However, as a long time Contra veteran, I can personally vouch for the quality of this game as a hand-held version of possibly the most popular shooter ever crafted. Operation C is sure to be an exciting addition to your hand-held collection and possibly your entire video game collection if you are a Contra fan like I am. It's small, it's different, it's quaint, it's Contra. Pop it into your Gameboy and love it like I do.

~Richard M.


*Scan of Operation C Box art from giantbomb.com

Don't forget to stop by our shop for retro gaming collectibles:

Thursday, November 19, 2009

Silent Hill - Alessa comes to Animal Crossing

Sometimes something already geeky, like being an adult playing animal crossing, needs something a little geekier. So borne out of discussion about one of the standard game wall papers, I got the idea to make a Silent Hill themed floor of my animal crossing house. It was honestly half hearted and while eerie, it wasn't quite there. My brother decided he could do a better job. The following are the fruits of his labours...

~

So...a long time in the making, this was an idea that spanned off of mainly impulse...it all started back when I was visiting my sister's house a few months ago...she looked at a "Shanty Wall" in Animal Crossing and said something like "My God, does that ever look Silent-Hilly." So she found a scary looking floor (Incidentally, the "Shanty Flooring") and filled her upstairs with all sorts of creepy looking items, such as strange pottery, eerie hospital equipment, and a haunting audio track. It was a nice try, did look rather depressing, but it still looked too bright. I thought I could do better, making my own designs. Using my own Wii which was with me, I made my first attempt at a custom Silent Hill flooring. And the rest is history.

So without further ado - The Animal Crossing Silent Hill House


MAIN FLOOR: The main floor's theme was originally going to be just random scary stuff that reminded us of Silent Hill. But I then decided that I would base it on the School area of Silent Hill. However, since I couldn't find the floor and what not that I wanted, I lost interest for a while...but upon finding some very nice school equipment, my interest was revitalized and I set out to make the best damn Midwich Elementary School replica Animal Crossing would allow.

-Normal-

Angle 1:

Angle 2:

Angle 3:


Although the Library Wall doesn't make a whole lot of sense, it's still pretty eerie which I decided was a fair trade. I used to have Birch Flooring on the ground but decided to go with Common Flooring after I found a new use for the Birch. I was pleased to have found those desks and chairs, and was happy to finally acquire the large Chalk Board as it is a two-piece item that "snaps" together. The Easel by the chalk board is based on a design I got from Wendell (the notepad design) and I added the faint "letters."

-Reverse Side-

Angle 1:

Angle 2:

Angle 3:


It's been suggested that I should leave the school floor for last as it really is my most impressive floor. But I'm trying to do it in a certain order, but yes...I really did kick this one's ass. I'm especially proud of the Halo of the Sun over there (The save point in Silent Hill 3). The floor was the very first custom design I made for the house, and the walls are the Third. I was very proud of those as well.

~~~~~~~

UPPER FLOOR: The upper floor's original theme was scrapped as it just didn't work well with the small size and windows, so I reluctantly moved that theme down to the basement and turned this into my rendition Alessa's childhood bedroom. I also made a reverse version although it seems a little wrong since there isn't normally one in the game but I really wanted to use the reverse floor/wall scheme that I did, so I decided to do it.

-Normal-

Angle 1:

Angle 2:


There weren't many distinctive features I could add here, so I just tried to make a nice, eerie bedroom. I did however make that design of a child's rendition of butterflies as it is pretty important to that theme. Sometimes I switch that design out for Alessa's dress pattern since my designs are always full. You can't really tell but there's also a grandfather clock in there for basic eeriness. Additionally, this is where I decided to put the birch flooring

-Reverse Side-

Angle 1:


Angle 2:


I really wanted to use this surrounding scheme for something, so I decided to just use it for this, although the bedroom shouldn't have a reverse side. I also thought it would be creepier (and also much easier) if all the items stayed unchanged despite the [dare I say horrific?] change of the surroundings. Here, I'm using the second design I made for the house, which was originally meant to be a wall. There are two angles and forms - one showing the original design (angle 2), and one showing what it looks like, placed and rotated (angle 1) which is how I usually set it.

~~~~~~~~

BASEMENT: I just got the basement for the house today and went straight to work on it at starting at 6 AM. I originally just wanted random scary, chain-linky, basement stuff in there like you'd see in Silent Hill but I had to put the bed/bench down there for the Hospital theme as it wouldn't be very right not to include it. So I just mixed the themes together to make Alessa's hospital room. I suppose it's sort of appropriate to put it down there. This room is always on the reverse side.

Angle 1:

Angle 2:

Angle 3:

Angle 4:


The basement was a hard sell for me but I think I finally got it to where I'm okay with it. There are about 10 stoves down there which are meant to resemble boilers, as you see plenty of boiler-like objects in the game. I'm using a Lab Bench and Amazing Machine it resemble Alessa's hospital bed and the nearby machinery. I can't tell you how proud I am of that wall. It took a long time to make and remake several times, but it was so worth it, definitely the best piece of design work I've done to date. I was going to make the floor down there the same but it seemed a bit repetitive, in the sense that the upper floor also had alike flooring and walls.

~~~~~~~~

House Exterior:


I liked this better when it was smaller, but I still rather like the outside...I'm especially proud of the seal of Medatron, I wish I had found more things to do with it inside the house.
~~~~~~~~
Regarding Alessa...

You'll notice she's wearing a different outfit in the first few images and outside of the house. You see, I made that school-girl dress for her to resemble her clothes from the game, but because all of my design space was used up before then, I really couldn't let her wear it. So in the images where she's not I gave her a mummy shirt, as a way to make her look bandaged, which is also appropriate. When she's wearing the school dress, I traded it the butterfly drawing for it at the Able Sisters, so the easel upstairs would have actually had the dress pattern on it at the time...

Other Info: Some down sides to this would be the lack of design storage, for one, as far as what you can use at one time, which is limited to eight designs. Another would be that although the flooring LOOKS metal, when walked on it still makes the sound of ceramic tiling. That's a bummer. Also the windows have the tendency to ruin the effect of the house, so it's nice that the basement had none.

One thing it was suggested I do would be to get an animal's key and keep it for myself to leave it in the house to be ever closer to the game. If an animal I don't like loses their key, I will certainly do this.

I use a musical track in the Reverse version of the rooms and the basement. It is the same track my sister used for her original attempt at the Silent Hill theme many months ago, and it is called "K.K. Dirge." It's a rather eerie tune, and is especially good at the end of its loop when you hear two loud, intimidating pounding noises. For effect it also has a skipping-record sound when it plays the first, lengthy, unsettling note. The main theme is a bit hokey for Silent Hill but I think having the track helps the rooms as a whole.


So yes...that's the Silent Hill House. It took a couple of months to make, what with the scrounging for appropriate items, and of course paying off the dreadful loans towards expansion. All of the custom designs were created by myself. My older sister Steph can also be credited for funding a lot of the project. I am very proud of it, and I know it makes me a new breed of mega-dork. If there are any questions, I will happily answer them. I'd explain everything in detail here but this journal is pretty damn long as it is. If the public interest is there, I'll make another journal showing off alternate design schemes/layouts for the rooms in the future.

Thank you for looking, I hope you've enjoyed it. I know I did.

~R.M.

Tuesday, May 12, 2009

Retro Review Tuesday: The best Contra III review ever

Something I've wanted to do for a long time is write vintage game reviews for a blog. So, in order to make my dream a reality, we're going to be attempting to post a new review every Tuesday. Our first one is a guest review by my awesome brother(though I helped a tiny bit with some wording and editing), mentioned previously in this blog, and focuses on one of the hardest games ever to grace the SNES, Contra III: The Alien wars. I can say without a doubt (and without bias) this is the best, most comprehensive Contra review you will ever read. It is so full of awesome that you would be overwhelmed if you were to read it all at once so it will be split into two parts.

So without further dawdling here's part I of the best Contra III review ever written:

PROLOGUE

Around fifteen years ago on a wet and gloomy morning, a main video game developer at Konami woke up late. He was in such a rush that he accidentally put body-wash in his hair, instead of shampoo. Getting out of the shower, he slipped on the edge of the tub, totally racking himself. In his haste, he spilled piping hot tea all over his outfit. He missed his train and ran a mile to his office. There, he got a call from his wife. Shame or not, she was leaving him and taking their son after his immense loss from the stock market. It all became too much. The world would feel his vengeance for this unbelievably unbearable day. They would all pay. At the weekly brainstorming session, the disgruntled developer begins to put his vindictive plan into order.

Contra III is introduced.


INTRODUCTION

First, a bit of Nostalgia, Contra III features many cameo appearances from past enemies. These instances include: two incarnations of the Stage One boss, the final boss from Super C, and a newly tricked-out version of Super C's Stage Six boss. The warm fuzzy feelings of nostalgia are nice before you realize that these enemies have now subscribed to Contra III's policy of "Take no Prisoners or Distinguishable Corpses."

Contra III - The Alien Wars is easily the most difficult chapter the already trying Contra series has enjoyed within its legacy. It will take you, hurt you, abuse you, and laugh in your tear-drowned face. Even the all-new even deadlier weapons and the luxury of being armed with two interchangeable guns won't soften the blow to your self-esteem that this game brutally delivers. With two fewer levels than the Original Contra and Super C, Contra III - The Alien Wars does to you in six levels what its predecessors couldn't do in a sum of sixteen.

Oh, and the Konami Code, that guardian angel of vintage gamers everywhere, has no power in this godless realm.


GAMEPLAY

--Layout--


Contra III follows the basic side-scroller game layout of the earlier games in the series, down to the occasional top-down view levels a' la Super C. Both level types display number of lives, weapon type, and number of smartbombs. On the main, side-scrolling levels, the classic "gun-'n'-run" principle applies, with a boss waiting for you at the end of the line.


On the top-down view levels, you are granted full control of movement (Forward, Backwards, left, Right), and you must located and destroy certain targets before you are given access to the level's boss. A map flashes onto the screen before you begin to play the top-down levels, allowing you to choose where in the level you would like to begin, and showing you where the main targets are located throughout the area. When playing two-player, you have the option to play these levels Split-screened, allowing both players to wander, freely (2 Player mode A) and with both players confined to the view of one full screen (2 Player mode B).

--Options--

Unlike the previous Contra games, Contra III allows you to choose the difficulty of the game (Easy, Medium, and Hard), and the amount of lives per continue. Easy is damn-near impossible, Normal is virtually impossible, and as far as I know, Hard is just impossible.

You may also alter the sound style (Stereo/Mono), Which is probably the only part of the game where you're really in control, ever.

--Maneuvers/Actions--

As in the classic Contra Games, your character can run forward, turn around, jump and duck. New to Contra III, your character can also hang onto and move along railings and ceilings, and climb up the sides of certain structures (it's not always clear which ones you can and can't climb).

In top-down levels, you can move forward, backwards, strafe left and right, and turn to the left or right. These levels can be difficult to get used to do to the strange controls.

Pushing left or right on the Directional Pad will cause you to strafe in the respective direction. To actually turn and aim that way, you need to push L or R (left and right, respectively). Jump has been replaced by the less-effective crouch in these levels, disabling you from movement while you're on the ground.

You can shoot ahead, up, down, diagonally up and diagonally down. You can also shoot in any of these directions while in the air, or hanging. You now carry two guns which you can change between to decide the best weapon for the given situation. You could use the perennial Spread Shot for clearing out a group, or switch to the unrelenting power that is the Laser for a concentrated attack on an enemy's core. When the player loses a life, the gun that was highlighted is also lost, but not the one in reserve. So for example, if you have both the Laser and the Spread Shot, and you're using the Laser, if you die, you will lose that gun, but the Spread Shot will still be available. You can then choose to switch to that gun, or just continue your battle with the default gun. If you push both L and R and the Fire button, your character will jump in the air, firing both guns in a spinning-attack*, with rounds flying every which way.

On a top-down level, this attack is a stationary spin from the ground. If the player holds down the dual-gun command in these levels, the attack is non-stop until the player lets go of the controls. Beware - if you die while highlighting both guns at once (It can be down without attacking) you will LOSE BOTH GUNS.

You cannot perform this technique if you're hanging on a railing/ceiling/wall or crouched in a top-down level.

*It should be noted that while is does turn you into a whirling ball of death, I've never found a realistic or useful time to perform the dual-gun technique however, performing it with Fire loaded in each barrel does look pretty spectacular.


--Weapons--

Contra III exhibits the classic weapons you remember from the past games, along with some of its own new arsenal. Here, the weapons are all listed, in order of their appearance, and broken down into their strengths and weaknesses, as well as the alternate effect(s) that some enjoy (or rue...) in the top-down areas (levels 2 and 5).


Default: Contra III finally figured out that if two guys are going to save the Earth from diabolical, ruthless invading Aliens, they're probably going to bring more than just a semi-automatic rifle. And thus, there is no Machine Gun pickup in this game, as it is your default weapon, firing at about 3 times the rate as the old Machine Gun. Don't get too excited, however. Although this gun does have a truly incredible rate of fire, it is still very weak. However, you will find more than one situation where the default weapon proves more useful than the others, even the Spread Shot. Like the original Contra games, you start off with this gun, and when you die, it resets to it.

Level 2 & 5: Basically the same thing. The shot travels for a bit then disappears into an unfilled circle, like any classic shooting game has taught us.

Shield: Going all the way back to the original Contra, nobody, probably not even the game developers, knows what the hell "B" stands for on this pickup. Nevertheless, in this updated version of the shield will surround your character in a blue aura, protecting you from all enemies and attacks, and destroying the hostiles that touch it. The aura will turn red when it's about to expire, a feature that would have been very convenient in the old games.

Level 2 & 5: Other than an inexplicable change to a different, less-cool color, this is essentially the same thing.

Smart Bombs: The falcon-shaped, flashing, classic smart bomb that destroyed all on-screen enemies in the classic Contra games now takes the shape of a small nuclear bomb that is collectible and detonated at the player's discretion. An alternating red and yellow energy sphere forms around you and gradually spreads throughout the screen, destroying/damaging all enemies on the screen until it is spent. These are generally a desperation weapon, used when you're surrounded with nowhere to go, need to hit an extremely elusive target, or, more commonly, when you accidentally press "A." Be aware though that your count goes back to one when you lose a life, nice if you had none, not so nice if you had four.

Level 2 & 5: Same thing. Virtually no change.

Spread Shot:
If you've beaten Contra or Super C, this gun is why. Appearing in a pair early in the first stage of Contra III, you have the option of equipping both barrels with this classic multi-shot bad boy. Unlike the original games, the Spread Shot is now somewhat automatic, firing in very quick bursts of two to three belts (fully automatic in close-quarter situations). There is a slight pause after this, which, due to the high-speed environment of Contra III can be a very fatal quarter of a second. Due to that, it's sad to say that the Spread Shot, the gun that saved your ass (admit it) in the classic NES Contra games, doesn't quite live up to the demands of Contra III's relentless onslaught. It is still a useful pickup, good for close-range battles with high-HP enemies, but in multiple situations, this gun is easily traded for another.

Level 2 & 5: Strangely, it's commonly seen releasing three-shot belts to the usual five, the top-down Spread Shot's lack of radius is made up for in its newly acquired fully-automatic properties only truly enjoyed in these levels, making it a noticeably more useful weapon here.

Heat Missiles - A gun new to the Contra series (Unless you count Contra Force, but nobody else did and you shouldn't either), the Heat Missiles prove useful in many situations with their fully-automatic nature, considerable rate of fire, and their homing qualities. The main drawback here is that when battling a boss with multiple targets, these guys don't exactly go for the target you'd prefer, so it's best to use these doing normal gameplay, and trade up when approaching a boss.

Level 2 & 5: You're basically dealing with the same thing. Not much changes here, other than the view.

Laser: Like its classic incarnation, the Laser is a gun of exceptional power, great for use on the core area of boss enemies. The beam damages stronger enemies several times before disappearing, and passes right through weaker enemies. However, with this great power comes foreseeable sacrifices in other areas of performance. The Laser's rate of fire is the lowest in the game, and its beam moves notably slower than the rounds of other weapons, leaving the player vulnerable to enemy attacks between shots. Though it is still much swifter than in Contra and Super C.

Level 2 & 5: This gun is nothing short of a beast in these levels. The slow, separate beams have been transformed into one everlasting, steady beam, quickly eradicating any hostile that crosses it. With all of its original power, the shortened range of the Laser's shot is a small price to pay for this kind of devastation.

A final note on laser, it cannot be ignored, that the new sound has been reduced to an electronic whine, a lamentable change from the classic MUCH more "badass" sound of Contra and Super C.

Cluster Bomb: Contrary to the opinion of the annoying man from the PSP commercials, Cluster bomb is not always the answer. In fact, in Contra III, it is arguably the most useless weapon in the game in most situations.
This gun, on average, shoots in bursts of three to five rounds then pauses and the bombs don't generally span the entire screen's length before detonating. Although quite powerful, more so than the laser even, with its less-than-desirable rate of fire, and lack of range, the Cluster Bomb is a weapon that's usually collected by falling on it.
However, there are very specific situations where the Cluster Bomb proves absolutely invaluable, such as the Boss at the end of the first stage, or the fourth Mini boss on the final stage of the game.

Level 2 & 5: The main difference here is that this weapon might be even MORE useless now, although it is pretty good for use on the giant centipede things.

Fire: First available in Level Two, the weapon that was possibly the most useless special weapon in the earlier Contra games has now proven to be possibly the most potent weapon in Contra III. Designed like an actual flamethrower for the first time, this gun boasts the ability to fire non-stop and pass though surfaces, making difficult targets nothing to blink at. The Fire's short range rarely proves to be much of a problem, although its slow changing of direction can occasionally prove detrimental.

Level 2&5: Only in these levels can the Fire be topped by the nearly unstoppable Laser. However, this gun should still be sought after here, exhibiting great performance clearing out many small enemies to taking down stronger hostiles. It's especially useful for its valuable surface-disregarding properties while fighting Level Two's boss.
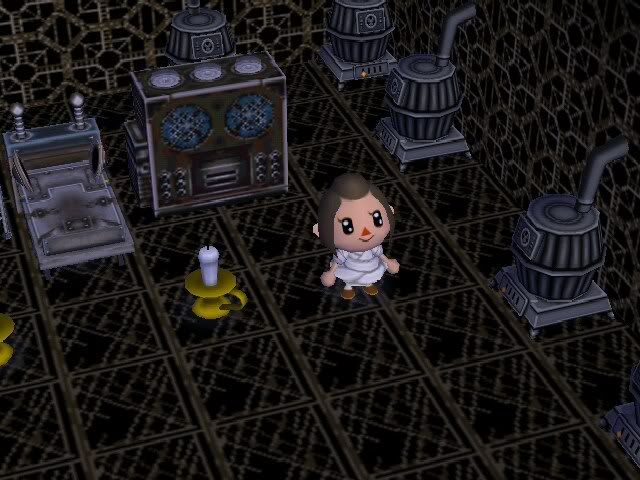

Tank: For a brief time in Stage One, you have the option to ride some of it out in a tank. The tank will function until it is destroyed by enemy fire, or until it gets to a certain point - whichever happens first. Pressing the fire button shoots the tank's large gun, a blast so powerful, it blows your vehicle back a few feet, and levels the vintage Contra base-bosses in one shot.
In my opinion, it's best to just run down enemies, and not waste time firing the gun. Then take one shot at the upcoming base.


That's it for Part I come back next Tuesday for part II featuring more screen shots, more details, more bosses and more punishment. PART II NOW POSTED

~Stephanie

LinkWithin

Related Posts with Thumbnails